Showing posts with label Vintage trims. Show all posts

Saturday, August 9, 2008

Sweet and Sinster Halloween Swap

Tutorial #1 {Halloween Tag Garland}


Our first Tutorial was hosted by the wonderful Laurie of Happy As a Lark Designs.
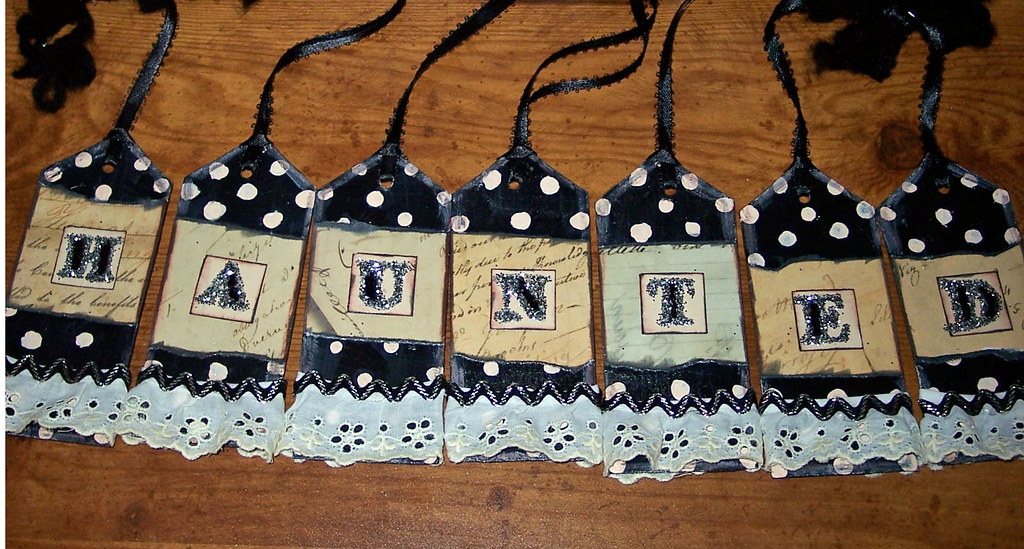
We made this fabulous Halloween Garland. You need to go and check out her blog and visit her Etsy shop for more of her whimsical work.

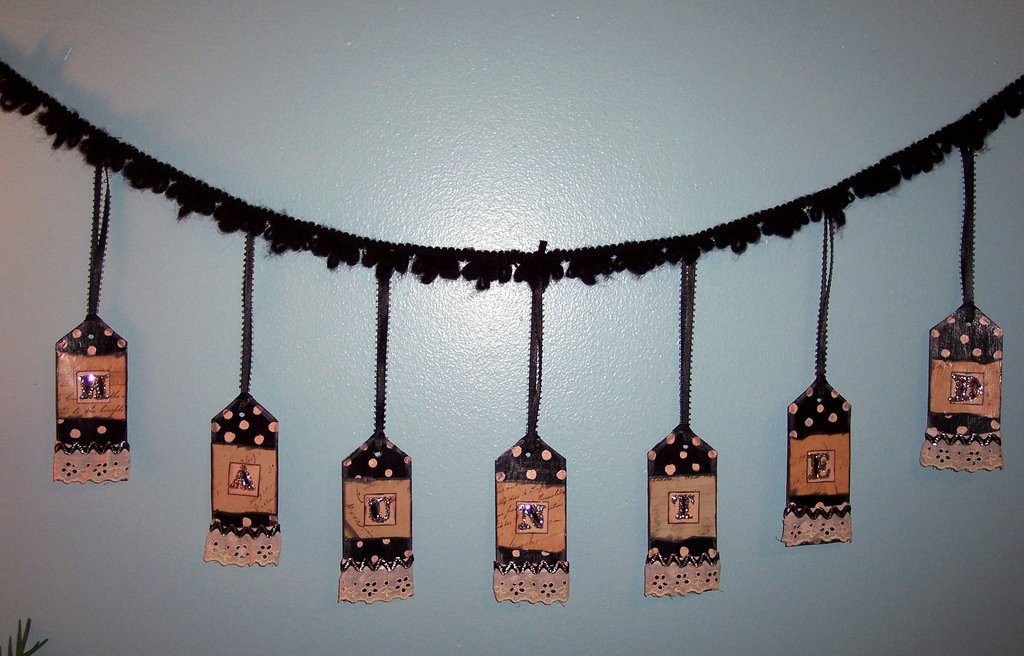
We used chipboard, printed papers, stamps, glitter, and ribbon. Painted the houses and then painted polka-dots on the houses.
Artsy Mama, is hosting a wonderful Sweet and Sinister Halloween Swap, with several known artist that are hosting tutorials for to us make Awesome Halloween Projects.

I want to thank all of you for your time and efforts that you are putting into this. We are having a blast.

Thanks for stopping by.


Debxx

Thursday, June 26, 2008

Pocket Sewing Kit

I have wanted a Pocket Sewing Kit for awhile now. So today when I was posting "The Ten Things" and I posted a picture of my material. I thought "hey I can make one using some of the new material I purchased.


I cut 2 pieces of material about 10 inches long by 4.5 inches wide. I cut a piece of quilt batting the same size. But trimmed it down on the sides before I stitched around all four sides, leaving a small opening for turning. I had also pinned some Pom Pom fringe along the top edge, so it would be out when I turned the material. I folded the bottom up to make a "pocket", I top stitched both long edges, catching the folded edge to make the "pocket".


Then I started embellishing it with Vintage rick rack to hold the scissors and needle bottle in place. Inside of the fold I pinned safety pins and placed a piece of card board with different colors of thread wrapped around it inside of the pocket. I sewed a small piece of rick rack on the scissors and snapped the rick rack to the inside of the "pocket kit". I tied buttons on the inside of the flap so that when needed they could easily be removed. Then to finish it off, there is a snap on the inside of the flap to hold it close.


I think it turned out really "cute." Couldn't think of another word for it.


I also think this will work for Hels new "In My Pocket" Challenge. With this challenge you have to hide the "theme" inside of the pocket. And the theme this time was BUTTONS. SO I am going to summit my piece and see what she thinks.

Well it's past time for bed, talk to you all tomorrow.


Hugs and good night,


Debxxx